User Manual
Managing ledgers
Once you sign up for an account, HostedBeans will automatically create a ledger named "My Ledger" under your account. You can use this ledger for bookkeeping immediately or upload your local ledger to overwrite it. To create additional ledgers, you'll need to upgrade to the Pro plan.
Clicking on Manage Collaborators in the ledger allows you to add collaborators. When you enter the email address of the collaborators you want to invite, they will receive an invitation on their Dashboard. Upon accepting the invitation, your collaborator can view the ledger on their Dashboard and access it with Fava or Git.
The Free plan can add one collaborator with the default read and write permissions. To add more collaborators or grant them read-only access, you will need to upgrade to the Pro plan.
The Pro plan can choose whether to make your ledger public when creating it. Public ledgers can be read-only accessed by anyone who knows the link and can also be cloned from the Git repository address. Those features are suitable for individuals or organizations needing publicly accessible accounts.
Fava access
You can view charts in Fava and use the Fava Editor to changes your ledger.
Changes made in Fava to the ledger will result in a commit being created under the modifier's name in the repository within seconds.
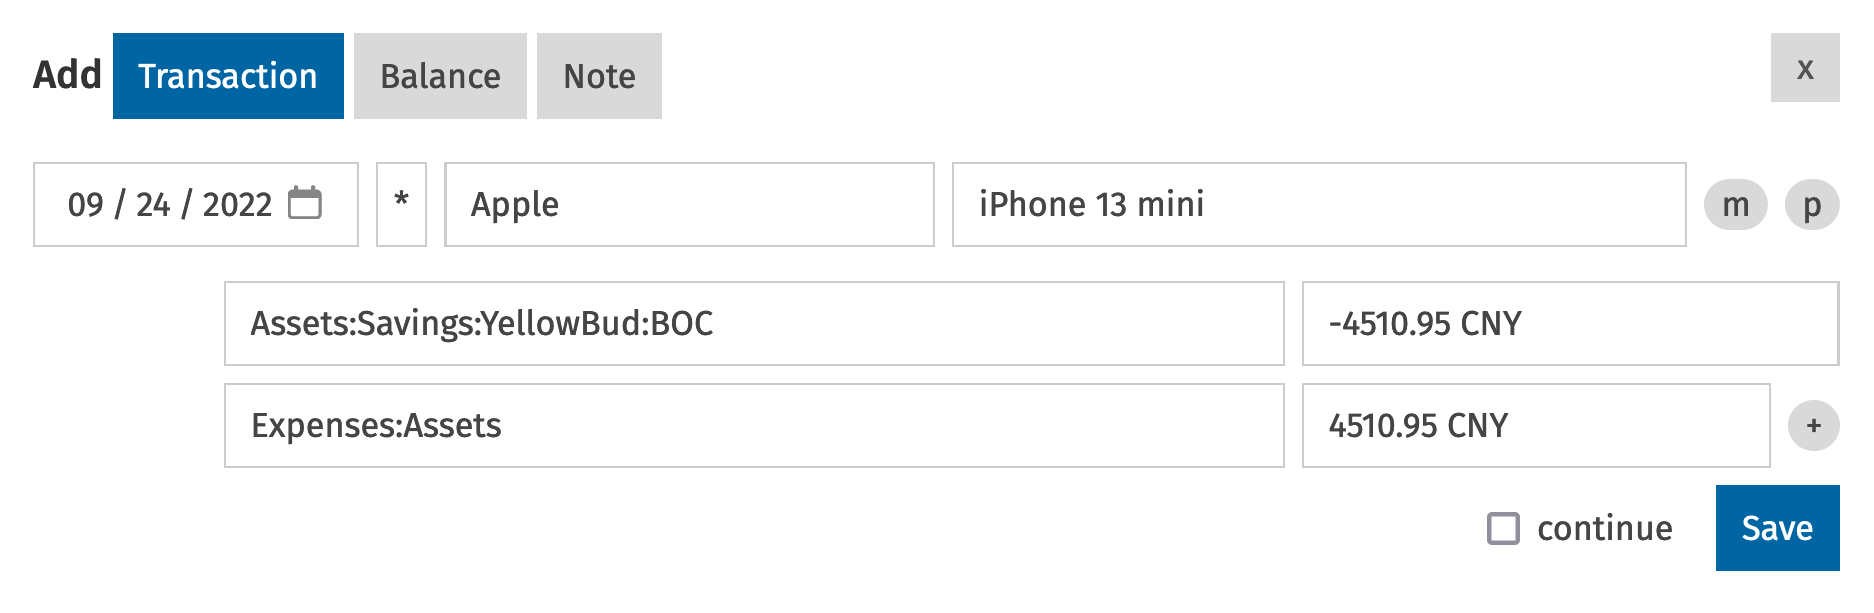
Quickly add transitions with Fava
You can use Fava to quickly add transitions using the plus button on the left side of the page:
New transitions will be added to main.bean by default, also commited to Git. However, if you want to add them to a different file, you can add an insert-entry option at the end of the file, like this:
# 2023.bean

# ...

2023-01-01 custom "fava-option" "insert-entry" ".*"
After that, new transitions will be added to 2023.bean before this line.
insert-entry is a option provided by Fava, its value is actually a regular expression, which can be used to add transitions about different accounts to different files. For more information, please refer to the Fava Help.
Git access
You can see the Git address of each ledger on the Dashboard, for example:
[email protected]:ledgers/1After you've set up your SSH keys on the Dashboard, you can use Git to access and manage the ledgers.
Setting the SSH key
SSH keys are your credentials for accessing your ledger via Git. To set up SSH keys, you should first find your public key on your local device (usually your computer), then put it into the Dashboard under Account Settings => SSH Key, and save it. If you need to save multiple keys, add one key per line.Below are instructions for finding your public key or creating a new key pair using the command line:
Listing files in .ssh directory:
$ ls -l ~/.ssh
-rw-r--r--  1 jysperm  staff   1058 Oct 22 09:10 config
-rw-------  1 jysperm  staff   2610 Oct 22 09:10 id_rsa
-rw-r--r--  1 jysperm  staff    574 Oct 22 09:10 id_rsa.pub
-rw-------  1 jysperm  staff  30228 Oct 22 09:10 known_hosts
Files ending with .pub is your public key, and it would normally be shown as id_rsa.pub, id_ecdsa.pub, or id_ed25519.pub. You can view your public key using cat command, like:
$ cat ~/.ssh/id_rsa.pub
ssh-rsa AAAAB3NzaC1yc2EAAAADAQABAAABgQDQYasxjWD1wbuVLy2NflAQIJGO+y13YIOKjh1AEymOGTOZJM/+LzWnZI9NJqWMFZP/BZ/TLe1TZ5sXk3Ylh9ek4Abgy04U0gsLbMGi/j2WjCOm4amhgLP4bqvb1RuV9JDl92uAmGuid0ARSUsZDWuGoo0ZpZrM3pdz829ymvbVy+kqcsmUkJ9HmfmzWOjsaavG4ulU79Kal+dRFv0+bVa+pBfV0qhLRENBjubKb2bt89JUsUWKCYKTycaFIbRrONoPb7WLFZK4PFpRo7gNzdk/HYQoWE9MDweSPKxgpGC3INm5kLMfo4BpBzb4cDxhSKO/qFht1nS4xKtrlps2yllynA6oIG1NU19HMbHGH/3Xv3riCCX1Z0fxW6ezljN+lx4Islp0ilpEPvZLJE8T7//6MFruWQHHWbMqkvdx1pqpLLZFvMSzKHWjY/q273Ab9Z45dRgH7luQ1YteuAjPH/6lnjuDUuFsG83gV6Rezr54tzgMP5z6xKV1chjhtNA3240= jysperm
If you haven't used SSH key before, you may need to create a new key:
$ ssh-keygen -t ed25519
Generating public/private ed25519 key pair.
Enter passphrase (empty for no passphrase):
Enter same passphrase again:
Your identification has been saved in ~/.ssh/id_ed25519
Your public key has been saved in ~/.ssh/id_ed25519.pub
The key fingerprint is:
SHA256:vXrjoFu64QJzrHKBNANRoSO9GJbuivulfxWtHYFAa9Q jysperm
The key's randomart image is:
+--[ED25519 256]--+
|.oo. .+o .       |
|.o.  . .E .      |
|*o.   o  . .     |
|+B . .  ..o      |
|oo+.    S+..     |
|o + o   o ..     |
| . *. ..o .      |
|+ oo...= oo      |
|+=o..o*o.o..     |
+----[SHA256]-----+
Afterward, you can use the cat to view your public key, like this:
$ cat ~/.ssh/id_ed25519.pub
ssh-ed25519 AAAAC3NzaC1lZDI1NTE5AAAAIBeMhL3Xj53p0VqDzARBYjWdrP+7olFnpYzs5yaI9D7G jysperm
ed25519 is a more advanced key algorithm. If your system doesn't support it, you can switch to the rsa algorithm, like this: ssh-keygen -t rsa -b 4096.
An SSH key can only be associated with one account. If you receive an error that your key is bound to another account, it's advisable to generate a new key pair.
Cloning a repository to local
$ git clone [email protected]:ledgers/1 'Your Ledger'Uploading changes to HostedBeans
You can use git commit and git push to upload your changes as usual. You can also create branches, merge branches, and more.
Overwriting the repository on HostedBeans
If you want to overwrite the repository on HostedBeans with your local repository, you can use the git push -f command:
$ git remote add origin [email protected]:ledgers/1
$ git push --set-upstream --force origin :
Note: This operation will cause data loss from the original repository on Hostedbeans.
Fava Plugins
Fava Dashboards
HostedBeans includes fava-dashboards v1.2.3, which allows you to create custom dashboards with charts and tables.
To enable it, add the following line to your beancount file:
2020-01-01 custom "fava-extension" "fava_dashboards"
Then create a dashboards.yaml file in the same directory as your main beancount file to define your dashboards. See the fava-dashboards for configuration details and examples.
Add to Home Screen (Web App)
You can add HostedBeans to your home screen on your mobile device to use it as a Web App:
- iOS and iPadOS: Open the HostedBeans in Safari, click the Share button, and then click Add to Home Screen.
- Android: Open the HostedBeans in Chrome, click the menu button, and then click Add to Home Screen.
The Web App is also available on desktop browsers:
- Edge: Click the menu button, and then click Install HostedBeans.
- Chrome: Click the menu button, and then click Install HostedBeans.
- Safari: Click the menu button, and then click Add to Dock.
The Web App allows you to use HostedBeans in full screen without the browser's UI.